 Agricultural Equipment
 Articles
 Email Signup
 Sell Your Machines
 Agricultural Equipment
 Agricultural Dealers
 Agricultural Articles
 Email Signup
 Sell Your Machines
Mon July 27, 2020
Little Beaver
Installing something below a paved surface sounds like a daunting task. While breaking and repairing the surface is one approach to adding pipes, cables and lines below a driveway or sidewalk, that method comes with extra labor, cost and challenges.
Consider going below the surface by implementing one of the many methods of boring. There are many options for such a project, each with its own manpower level, space restrictions and budget.
With a larger budget and a bigger project — like a driveway or road surface — investing in a bigger piece of machinery might be the best option. But for a smaller project, like installing landscape lighting wires under a sidewalk, consider a less invasive, more affordable option.
Four of the most common ways to bore under a paved surface include manual installation, directional drills, impact moles and earth drill boring.
Manual Installation
For those with a lower budget and a willingness to utilize manpower, there are several simple options for boring without much equipment.
Physically forcing a pipe through the ground with a sledgehammer and raw muscle power is one way. This method can be dangerous — think repetitive stress injuries, risk of slipping and hitting the operator, workers' compensation claims, etc. It's also labor-intensive and is limited when it comes to powering through rough material. It also can result in unlevel installation.
To improve safety during this method, make sure all workers are wearing protective gear and are aware of surroundings during the process.
Another manual method is using a pressure washer with a zero-degree nozzle to power through the ground. This method can result in cracking the sidewalk. It also can be extremely dangerous, as loose soil and rocks can fly out during the process.
Similar to the sledgehammer method, you can reduce the risk of injury by wearing protective gear.
A third method — one that requires limited equipment — involves a duckbill shovel or spade. This labor-intensive method takes time, effort and often ends up with digging at awkward angles. Workers face the risk of injury from repetitive motion, and this method can greatly extend the length of time on the whole project.
Directional Drills
For larger projects, it's obviously not realistic to rely on basic tools and elbow grease. Directional drills take some of the effort out of horizontal boring.
These drills are a better option for bigger projects — usually 100 ft. or more — that require installing pipe or cable.
The size of a project and the use of the drill requires a small team to safely maneuver the drill to get the job done.
Costing upwards of $90,000 and weighing at least 3,000 lbs., directional drills can be a large investment and difficult to maneuver. If a machine is available to rent, a directional drill might be a realistic option for occasional projects. Their power, accuracy and improved safety make them a more attractive choice over manual methods.
Compact directional drills offer an easier-to-use product, but their advanced technologies skyrocket the prices. They weigh less than large directional drills and require fewer people. Along with that, their compact size lessens the damage to established landscaping.
Impact Moles
Impact moles, also known as piercing tools or simply "moles," are commonly used to bore under highways and larger paved surfaces.
Compared to directional drills, they're smaller and less expensive, but are still costly to buy or rent. Moles usually take two or more people to operate — in addition to requiring multiple steps and time for assembly — making them a hassle for a small landscaping project.
An air compressor activates the mole head, which hammers its way through the material. Moles are accurate and available in a variety of diameters, but their price tag is often off-putting for those with a smaller budget.
Earth Drill Boring Kits
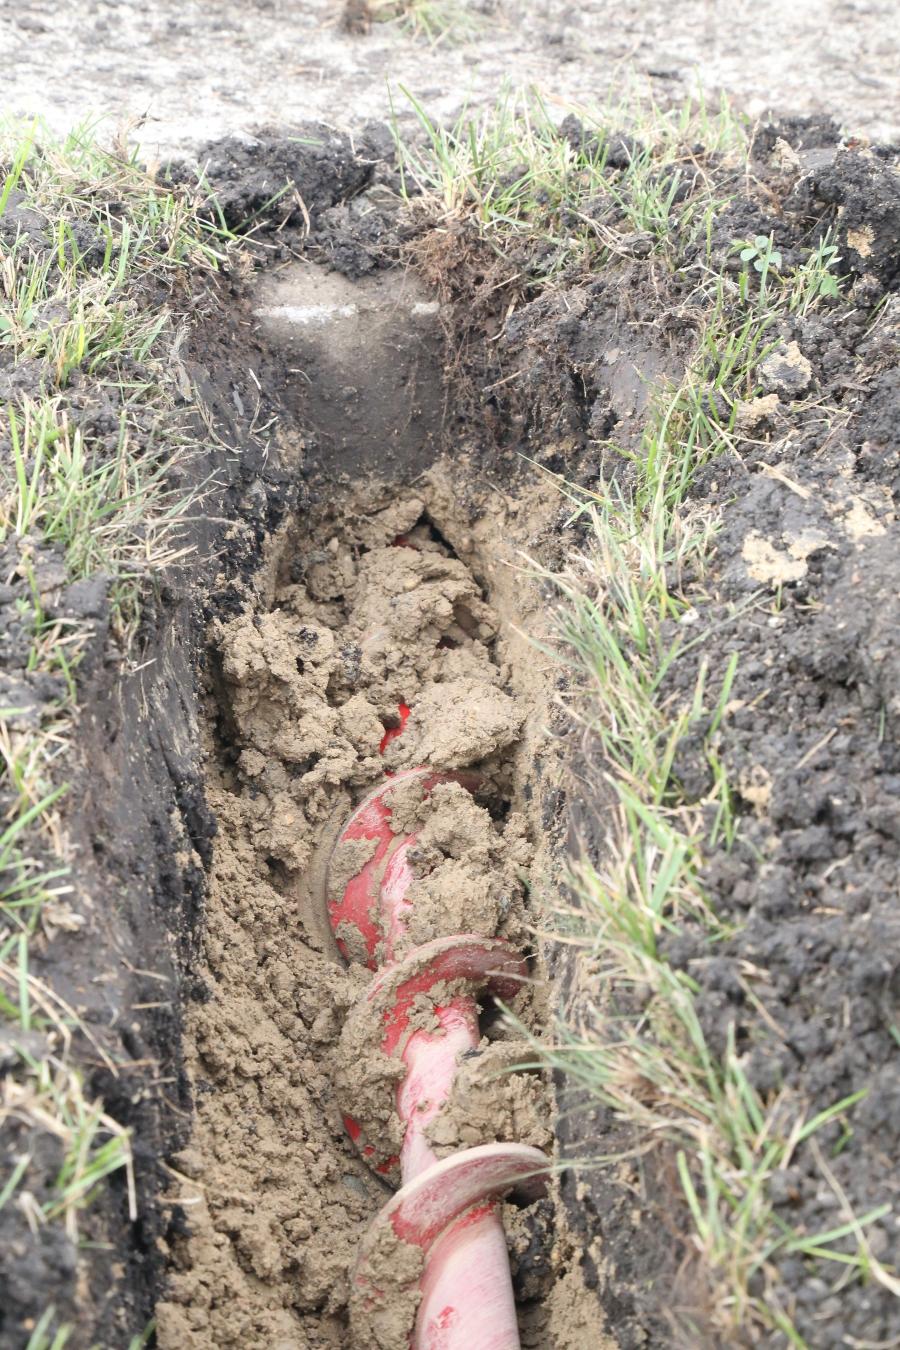
Some manufacturers offer attachments that turn standard mechanical earth drills into versatile horizontal boring machines. The attachments take on smaller projects, such as boring under sidewalks and driveways, and are easy for one person to operate, unlike larger directional drills that require more people. Earth drills are ideal for installing conduit, pipe and irrigation systems.
Besides being easier to operate than many alternative methods, the cost of a horizontal boring kit also is considerably lower than most other equipment options. Landscapers and DIYers don't need to worry about extra equipment expenses when all they need is the drill and kit.
Another benefit of these attachments is that they're lightweight and easy to maneuver. This makes them ideal for use in residential areas.
The drills enable operators to install underground sprinkler systems and run lighting in half the time and with less effort compared to using a sledgehammer to drive the pipe under the pavement. Perhaps most notable is the ergonomic use of an auger compared to a more manual process.
Some manufacturers offer two types of horizontal boring kits: dry auger kits and wet drilling kits. The dry kits are designed for creating small bores up to 5 ft. long. The wet drilling kits are used for lengths up to 50 ft. With two varying options, users can complete just about any project.
While the ideal time to install something under a sidewalk or driveway is before paving the surface, that's not always an option. With a variety of horizontal boring options available, there's certainly a method perfect for each project. No matter which one is used, they are all more attractive than tearing up and replacing a sidewalk or driveway.
For more information, call 800/227-7515 or visit www.littlebeaver.com.
This story also appears on Construction Equipment Guide.